Overview

The process of creating our final performance was a very hectic but rewarding experience! We had a lot of fun working together and combining all our ideas to create one cohesive piece. We experienced several challenges along the way, such as difficulty matching the visuals with the sounds, and also combining the buildups with the beat drops in a way that makes sense, but we got there in the end! We found it hard to split the work into sections and then each working on our sections, so our approach to creating our final piece was to work on everything together. For example, Louis took charge of creating the music, so Shengyang and Debbie would support Louis during this process and offer feedback instead of working on other things (Debbie took charge of Hydra and midi while Shengyang took charge of p5.js). This definitely prolonged the process of creating the final performance, but we found that working this way made the final result feel more cohesive. If we could work on this project again, we would first choose a theme so that we’d be able to split the work into sections and successfully combine our work to make a cohesive piece. Overall, we are very proud of how far we have come! It was an amazing experience working with the team, everyone in the class, and Professor Aaron! We learned a lot of skills that we will continue to use in the future!


Debbie’s part:

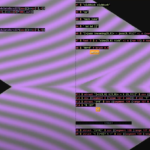
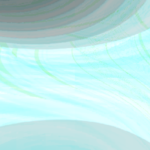
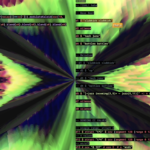
For our final performance, I focused mainly on creating visuals (with Shengyang) and tying the whole piece together. Initially, I created the following visual with p5.js. 

I really liked this visual because I liked how the size of the hole in the centre could be manipulated to mimic the vibrations on a speaker, or even a beating heart. But my issue with it was that I found it difficult visualising what I could do with the visual other than changing the size of the hole. I tried changing the shapes from squares to something else or combining them with the hydra, but nothing felt right. I wanted to create a visual that could be used throughout the whole piece and changed in unique but cohesive ways. So, a week before the performance, I decided to change the visuals from this to the following:

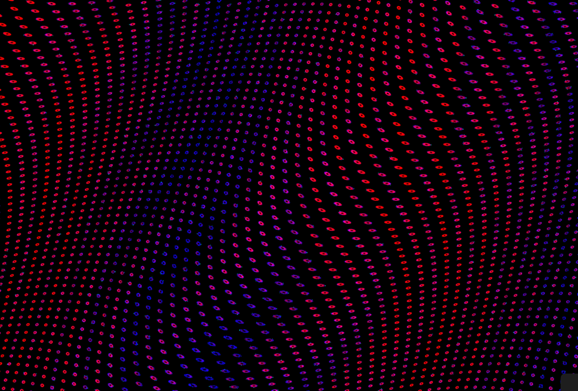
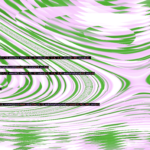
What I loved about this visual is that the code was so straightforward, and little changes to it could change the visual in huge ways that still remained cohesive. This visual was made completely with Hydra. Here is a snippet of the code:


osc(215, 0.1, 20)
.modulate(
  osc(2, -0.3, 100)
  .rotate(15)
)
.color(0.9, 0.0, 0.9 )
.modulate(
  osc(6, -0.1 )
  .rotate(9)
)
.add(
  osc(10, -0.9, 900 )
  .color(1,0,1)
)
.mult(
  shape(900, (()=>cc[1]/4), 0.5)
  .luma()
    .repeatX(()=>cc[3]*100)
    .repeatY(()=>cc[3]*100)
  .colorama(10)
)
.modulate(
  osc(9, -0.3, 900)
  .rotate(()=>cc[0])
)
.out(o0)

Louis’ part:

Like Drum Circle, I basically take charge of the music part of our final work. This is because personally speaking, I am more enthusiastic about making music and have also accumulated some experience creating music via Tidal. In the process of making this final piece, I was inspired by other works, including some works on Garageband (very brilliant works they are but are quite difficult to be realized by using Tidal), the beat-box videos Aaron recommended we watch, and of course our own works (namely the Drum Circle). For me, the most critical parts of this work are the two drops. We spend a lot of time making the two drops to have a good effect of carrying on the top and starting the follow-ups. Take the second drop as an example, we crossed-use the two main melodies (one is the main motif of the main work, and the other one is the melody played at the end. By doing this, I believe we have managed to tie the previous content together and enhance the rhythm of the drop section very effectively (based on the reaction of the audience during the live performance, this section should be quite successful).

I want to thank my two lovely teammates Shengyang and Debbie, they gave a lot of useful advice on how to make the melody as well as make the whole structure of the music part make sense. I also want to thank Aaron for providing great suggestions on improving especially the first drop (at first we have a 16-shot 808 which makes itself more like the drop part than the real one).

Without their help, I won’t be able to realize this work alone.


Shenyang’s part:

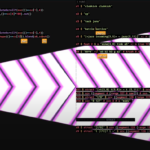
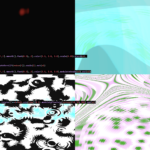
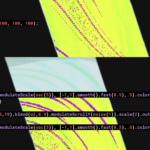
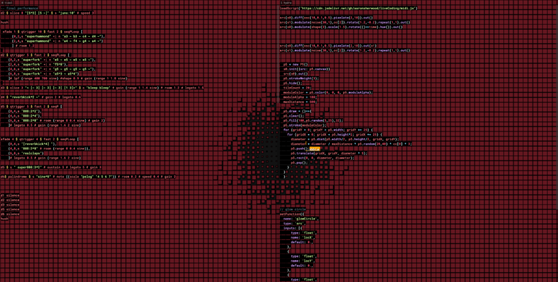
In the final project, I am mainly responsible for the production of the p5.js part. I was also involved in some musical improvements and a part of the abandoned visuals. I will mainly talk about the p5.js part we realized and put in the final performance. First, we used laser beams, which are realized in p5.js. This effect is added to the top layer of the original hydra section in the second half of the show. This is a screenshot of a combination of the laser beams from p5 and hydra.

The laser beam effect is actually inspired by the MV of A L I E N S by Coldplay that Louis showed us, you can find the MV here, and the laser beam appears at about 2:30. This is the laser beam in the MV:

I used a class to store the location and direction of each beam:


 class RayLP {
  constructor(x, y, startAngle) {
    this.originX = x;
    this.originY = y;
    this.distance = 0;
    this.angle = startAngle;
    this.stillOnScreen = true;
    this.speed = 1;
    this.length = p2.floor(p2.random(8,17));
    this.color = p2.random(0,1);
  }
  move() {
    this.distance = this.distance + this.speed;
    this.speed = this.speed + this.distance / 350 + ccActual[9];
  }
  check() {
    this.stillOnScreen = (this.distance < width / 2);
  }
  destroy() {
    delete(this);
  }
  show() {
    p2.push();// remember the fill and stroke before
    if(this.color > 0.5){
    p2.stroke(220,65,255, 180 - this.distance);}//, 255 - this.distance * 2);}
     else{p2.stroke(139,0,50);}
    p2.strokeWeight(9);
      if (this.stillOnScreen) {
      for (var i = 0; i < this.length; i++) {
        var x = this.originX + (this.distance + i *2) * p2.cos(this.angle);
        var y = this.originY + (this.distance + i *2) * p2.sin(this.angle);
        var xTo = this.originX + (this.distance + i * 10 ) * p2.cos(this.angle);
        var yTo = this.originY + (this.distance + i * 10 ) * p2.sin(this.angle);
        p2.line(x,y,xTo,yTo);
      }
    }
    else{this.destroy();}
    p2.pop();  //restore fill and stroke
  }
}

And in the p5 draw function, each frame the program will show and check, and push new laser beams into a list. We finally changed the color/stroke to dark purple and dark red just like the background. After building the hydra function on the laser beam effect, it can twist like the background dots, which makes the effect less abrupt.

Notably, I had some silly errors in my p5 code, and Omar gave me some very inspiring advice. Thanks a lot for that! Also, there was no delete(this) part in the class code at the beginning, which doesn’t cause any obvious problems in the p5 editor. But when migrated to hydra, whether used in Atom or in Flok, it quickly fills up memory. This can make the platform stuck or slow to respond.

I was also in charge of realizing the visuals for the surprise Merry Christmas session at the end. This is migrated from the Examples of p5.js that can be found here.

The syntax for declaring classes this way doesn’t seem to be very acceptable in hydra, so I’ve replaced it with a more common way of writing it that is acceptable to the hydra.

I really enjoyed the class, very intellectually stimulating. Thank you so much to professor Aaron, my teammates, and my lovely classmates! I will miss you guys!

You can find videos of our performances here:

Last but not least:

once $ s “xmas” # gain 1.2 # room 1.5


Looking back at our final performance composition, we’re not really sure how this thing came together! Like the previous projects, we would bring in different sounds to our work sessions and visuals that we previously played around with and try to make something out of them. Perhaps one of the defining moments of this performance was the buildup exercise as this is when the creepy, scratchy visuals came together with the glowing orb from our drum circle project.
So, this was the starting point for this composition, the chalkboard-like scratchy visual which inspired us to do something kind of creepy and menacing, while involving some kind of grace and elegance.

Sounds
Eadin and Sarah were mainly working together on sound. Although the visuals kind of dictated the creepy vibe, we wanted to maintain our interest in using ambient sounds like what you hear at the beginning of the piece. Later on, instead of staying scratchy and heavy, the piece involves some piano melodies (some of which we spent ages trying to fit by looking through different scales and picking specific notes). However, a lot of the sounds came through by experimentation and live editing. Finally, we made sure that our piece also included a more positive, colorful sound in an attempt to make it sound more complete and wholesome.

Code Snippets

ambient = stack[
    slow 4 $ n (scale "<minor>" $ "{<g> <fs gs>}" - 5)  # s "supercomparator"  #lpf 500 #shape 0.3 #gain 1.1,
    slow 4 $ n (scale "<minor>" $ "{<g> <fs gs>}" - 5)  # s "superfm"  #lpf 500 #shape 0.3 #gain 1.1,
    slow 4 $ ccv "0 10" # ccn 0 # s "midi"
    ]


//piano buildup

first_piano_ever = every 2 (fast 2) $ fast 2 $ stack [n (scale "<minor>" $ "<f d <e a> cs>") # s "superpiano" #lpf 600 #shape 0.3 #room 0.3 #sustain 3, ccv "<20 32 <23 44 22 25 50> 60>" # ccn 2 # s "midi"]
first_piano_ever_v1 = every 2 (fast 2) $ fast 2 $ stack [n (scale "<minor>" $ "<f d <e a e*2 a> cs>(2,9)") # s "superpiano" #lpf 600 #shape 0.3 #room 0.3 #sustain 3, fast 2 $ ccv "<20 32 <23 44 22 25 50> 60>(2,9)" # ccn 2 # s "midi"]
first_piano_ever_v2 = every 2 (fast 2) $ fast 2 $ stack [n (scale "<minor>" $ "<f d <e a e*2 a> cs>(5,9)") # s "superpiano" #lpf 900 #shape 0.2 #room 0.2 #sustain 1 #gain 1.1, fast 5 $ ccv "<20 32 <23 44 25*2 50> 60>(5,9)" # ccn 2 # s "midi"]
first_piano_ever_v3 = fast 4 $ stack [n (scale "<minor>" $ "<f d e cs>(4,8)") # s "superpiano" #lpf 900 #shape 0.2 #room 0.2 #sustain 1 #gain 1.1 , fast 4 $ ccv "<20 32 23 60>(4,8)" # ccn 2 # s "midi"]
first_piano_ever_v4 = fast 8 $ stack [n (scale "<minor>" $ "<f d e cs>(2,8)") # s "superpiano" #lpf 900 #shape 0.2 #room 0.2 #sustain 1 #gain 1.3, fast 4 $ ccv "<20 32 23 60>(2,8)" # ccn 2 # s "midi"]


//drum buildup
d2 $ qtrigger 2 $ seqP [
(0, 4, fast 4 $ ccv "0" # ccn 0 # s "midi"),
(0, 16, fast 1 $ "~ bd [bd ~] bd*2"),
(2, 16, fast 1 $ "[bd, hh, bd, sd]"),
(4, 16, fast 1 $ "[~bd, hh*8, bd(3,8), sd]"),
(0, 8, fast 1 $ ccv "0 0 0 10" # ccn 4  # s "midi"),
(8, 16, fast 2 $ "[~bd, hh*8, bd(6,8,3), sd]"),
(8, 16, fast 2 $ ccv "0 0 0 10" # ccn 4 # s "midi"),
(9, 16, fast 2 $ "[~bd*4]"),
(10, 16, fast 2 $ "[~bd*4(5,8)]"),
(12, 16, fast 2 $ "[~bd*4(5,8), hh*8, bd, sd]"),
(10.5, 11, fast 2 $ n "as a f a" # s "superpiano" # lpf 900 #shape 0.3),
(10.5, 11, fast 2 $ ccv "90 70 50 70" # ccn 2 # s "midi"),
(12, 12.5, fast 2 $ n "as a f a" # s "superpiano" # lpf 900 #shape 0.3),
(12, 12.5, fast 2 $ ccv "90 70 50 70" # ccn 2 # s "midi"),
(13, 15, fast 1 $ n "as a f a as a bs a" # s "superpiano" # lpf 900 #shape 0.7 # gain 1.2),
(15, 16, fast 2 $ n "as a f a as a bs a" # s "superpiano" # lpf 900 #shape 0.9 # gain 1.4),
(13, 15, fast 1 $ n "190 170 150 270 190 720 120 270" # ccn 2 # s "midi"),
(15, 16, fast 2 $ n "190 170 150 270 190 270 120 270" # ccn 2 # s "midi"),
(12, 16, slow 2 $ s "made:3(50,8)" # gain (slow 2 (range 0 1.25 saw)) # speed (slow 2 (range 0.8 3.5 saw)) # cut 1 # lpf 900 #rel 0.5)
] #shape 0.3 #room 0.3 #size 0.6 #gain 1.4


Visuals
The visuals were Omar’s work, with the main inspiration for the audio composition being his creation. Most of what you see in the performance were derivates of this first visual layered with different elements, including the glowing orb that we used in our drum circle and looked at in class. After Omar put together the visuals, we would meet together and test out audiovisual interactions that we felt could be effective for the audience || Eadin and Sarah had my back for a good week and a half while I was working on capstone so just a big props to them for making awesome music that inspired and motivated me to make fitting visuals. Visuals were inconsistent because of our attempt to exploit glitches (by not hiding p5) in making a very pleasing visual. Some of the visual quality had to be sacrificed for reliability during the performance. Our last visual also didn’t show in the performance because I had toyed a bit with variables before the performance. But I think it was alright regardless, we learned to improvise.

Code Snippets

lightning = () =>
{
  return(
  src(o1).mult(src(s0).add(noteLine(),0.8).add(noteLineThin(),0.8)).blend(o0,0.3).modulate(o1, 0.03)
    ) //lightning light
}
flash = () =>
{
  return(
  src(o1).diff(o0).mult(src(s0).add(noteLine(),0.8).add(noteLineThin(),0.8)).modulate(o1,0.03) //lightning
    )
}
flashH = () =>
{
  return(
  src(o1).mult(src(s0).add(noteLine(),0.8).add(noteLineThin(),0.8)).modulate(o1,0.03).diff(o0) //lightning with flash
}
flashGH = () =>
{
  return(
    src(o1).mult(src(s0).add(noteLine(),0.0).add(noteLineThin(),0.0)).blend(o0,0.3).modulate(o1, 0.03)
  //lightning with flash HEAVY
    )
}


tissue = () =>
{
  p1.colorMode(p1.RGB);
  p1.noFill();
  p1.stroke(255, 0.1);
  xoff += 0.02;
  yoff = xoff;
  for (let i = 0; i < 10; i++)
  {
    p1.push();
    _x = p1.noise(xoff)*p1.width;
    _y = p1.noise(2*yoff)*p1.height;
    _r = p1.random(3);
    _hyp = p1.sqrt(p1.pow(width/2, 2) + p1.pow(height/2, 2));
    _d = p1.map(p1.dist(_x, _y, p1.width/2, p1.height/2), 0, _hyp, 0.05, 1);
    //only first shape gets bold on drums
    if(i == 0 && p1.frameCount%4==0)
    {
      _s = 50 + 10*ccActual[4] + 50*ccActual[1];
      p1.stroke(255, ccActual[4]/4 + 10*_d);
    }
    else
    { 
      _s = 50;
      p1.strokeWeight(1);
      p1.stroke(255, 10*_d);
    }
    //circle
    if (_r < 1)
      p1.rect(_x, _y, _s, _s); 
    //square
    else if(_r < 2)
      p1.circle(_x, _y, _s); 
    //triangle
    else
    {
      _angle = p1.random(0, 2*p1.PI);
      _angle2 = p1.random(0, 2*p1.PI);
      _angle3 = p1.random(0, 2*p1.PI);
      p1.triangle(_x+_s*p1.cos(_angle), _y+_s*p1.sin(_angle), _x+_s*p1.cos(_angle2), _y+_s*p1.sin(_angle2), _x+_s*p1.cos(_angle3), _y+_s*p1.sin(_angle3))
    }
    p1.pop();
    yoff += 0.05;
  }
}


Explaining some Creative Choices
combining Hydra diff coupled with a blend or modulate to have a lasting flash effect of the light on the canvas when the light pops into a random position. This is better achieved with instantaneous/discrete change of light positions than continuous movement.
modulating slightly with the light orb gives a 3-dimensional quality to the movement of the light, which nicely translates the drum impact.
the piano tiles were recycled from the composition project. The visual looked a little too round and symmetrical so we opted for more asymmetry by making the tiles on both ends of the canvas different sizes. Part of it was also that Sarah liked the smaller tiles and Eadin the bigger ones. So we chose to pick both and it worked well visually.


More Notes on Final Performance / Reflection
In terms of the final performance, we didn’t notice that the tidal code constantly disappeared (aka. the zoom-out thing). What we have learned here is that while performing it’s important to ensure what’s actually going on on the main screen. In addition, while doing it on stage, our pace was a bit slower than practicing, because once you miss the opportunity to trigger something you have to wait for, say, the next 2 or 4 cycles. We think there’s definitely value in improvisation. The point is how we can find a balance between following a strict plan and improvisation and this is something that we continuously experimented with as we practiced for the final performance.

The 8bit Orchestra was an incredible experience, it was so exciting to put together a lot of creative energy and come up with a piece that stuck with us to the point that we were humming it every day leading up to the performance. Moreover, seeing everyone’s work come together, from our two-minute, nervous performances in class to our algorave was an amazing reminder of our progress and the time we all spent together.


Below is a video of our performance:


<3

Hi, flock-ers! Or should we say, hackers? Happy finals season — enjoy our documentation:

How We Started, aka the Chaotic Evil:

During the first two weeks of our practice, we approached the final project with the drum circle mindset. For every meeting, we would split into Hydra (2 ppl) and Tidal (2 ppl) teams and improvise, creating something new and enjoying it. When it came time to show the build-ups and drops, we struggled, because we had a lot of sounds and visuals going on separately, but not in one sequence. One evening, we created a mashup which later turned into our first build-up and drop music, yet without cohesive visuals or any other connecting tissue.

How We Proceeded, aka Narrowing the Focus:

A week later, Amina and Shreya were still improvising with Tidal, perfecting the first build-up and drop along with composing the second one, while Dania and Thaís were working on visualizing the first build-up and drop. One moment, Shreya was modifying Amina’s code, and a happy accident happened. That turned into our second drop, with a little magic of chance at 11 PM in the IM Lab.

At the same time, we also decided to narrow our focus only to certain sounds or visuals, critically choosing the ones that would go with our theme and not sound disintegrated or chaotic. 

The Connecting Tissue, aka Blobby and Xavier:

While working on the visuals, we decided to use simple shapes to make it as engaging and as aesthetically pleasing as possible. We narrowed down the visuals that we made during our meetings into 2 sections, circles and lines, which we later decided to name Blobby and Xavier respectively. The choice of circles growing was inspired by our dominating sounds – ‘em’ and ‘tink’ in the first build-up. When we thought of these sounds, Blobby is the visual we imagined. Similarly, Xavier was given its form. Dania and Thaís came up with this names. 

Initially, we wanted to tell the story of the interaction between Blobby and Xavier but the sounds we had did not quite match up with the stories we had in mind. From there, we started to experiment with different ways we could convey a story that had both Blobby and Xavier. Since we already had the sound, we started thinking of what visuals looked best with the sound that we had, and then it all started coming together almost too perfectly. 

We had the sounds and visuals for our 2 build-ups and drops but we needed some way to connect the two. Because Blobby and Xavier had no connection with each other, we tried finding different ways to connect them so the composition would look cohesive. This is when we decided to stick with one color scheme throughout the entire composition. We chose a very bright and colorful palette because that’s the vibe we got from the sounds we created. To transition from Blobby to Xavier, Dania came up with the idea of filling the entire screen with circles after the first drop. The circles would then overlap and create what looks like an osc() that we can then slowly shrink till it becomes a line that can then be modulated to get to xavier. Although this sounded like a wonderful idea, it was a painful one to execute. But in the end, we managed to do it and the result was absolutely lovely <3

Guys, let’s…. aka Aaron’s “SO”:

As we were playing around with the story behind Blobby and Xavier, Shreya and Dania came up with an idea… “Guys, what if we add Aaron’s voice into the performance?” Of course we could not resist, especially when Thaís happened to have a few of his famous lines recorded. This idea quickly became the highlight of our performance and provided us with a way to transition between the different buildups and drops we created while also adding some spice and flavour to our performance.

The Midi Magic aka How It All Came Together:

We had the sounds and the visuals but we still needed some way to connect the 2. This is where the midi magic happened. Because we had a slow start to the music, we decided to map each sound to a visual element, using midi, so that each sound change can be accompanied by a visual change and it doesn’t get monotonous either on the sonic or the visual side. But after the piece builds up, we thought it would be too much to have each sound correspond to a visual element so we grouped the sounds we had together into different sections, for example, all the drum sounding sounds would correspond to one specific visual element. For example, clubkick and soskick would both modulate Blobby instead of one of them modulating it and the other having some other effect. We also thought it would be better to have the dominant sounds have the biggest visual change – something that was inspired by the various artists’ work we saw in class. We applied the same concept to Xavier. While linking the sounds with the visuals, we also put a lot of thought into what the visual effect of each sound should be. We used midi to map the beat of the sounds to the visual change and also to automate the first half of the visuals and somehow, we ended up using around 25 different midi channels (some real midi magic happened there). 

one_min_pls(), aka the story of our composition

Once we had our composition ready, now was time for the performance, after all, it is live coding! So we had to decide on how we wanted our composition to look on screen, how to call the functions or evaluate the line, while also having some story. One thing all of us were super keen on was for it to have a story, and not random evaluation of lines. After much discussion, we decided to make the composition a story of the composition itself – how it came to life and how we coded it. To do this, we decided to make the performance a sort of conversation between us, where the function name would sometimes correspond to something we would usually say while triggering that specific block of code (ie. i_hope_this_works() for p5 bec it would usually crash) and other times they would be named based on what we were saying at the time (ie. i_can_see_so()). Because the function names were based on our conversations, it was really easy (and fun) to follow and remember – all we had to do was respond to each other as we usually would. It was a grape 🍇 bonding experience

Reflection(do we include this? ) CAUTION: the amount of cheese here is life threatening:  

Our group was very chaotic most of the time, but that somehow seemed to work perfectly for us and we’re glad we were able to somehow showcase some of this chaos and cohesiveness through our composition.Through our composition our own personalities are very prominent. Everytime we see a qtrigger, we think of Shreya. A clubkick reminds us of Thaís and the drop reminds us of how we accidentally made our first drop very late at night and couldn’t stop listening to it. The party effect after the drop reminds us of Amina (i’m not sure why?) and everytime we hear our mashup we start dying from laughter. At times we could even see the essence of ourselves through this composition. What we really liked the most about it is that we would usually get excited to work on it – it didn’t feel like a chore but rather it felt like hanging out with some friends and jamming. 

P.S: 

The debate has finally been settled by vote from the class, hydra-tidal supremacy hehe

– someone who is obviously wrong

No it hasn’t, I yielded because of Shreya’s mouse, nothing else. 

– the voice of reason

Documentation video of our (live) performance:

Documentation video of our (not SOOO live) performance:

Final Hydra script of our performance:

https://github.com/daniaezz/liveCoding/blob/main/aaaaaaaa.js

Final Tidal start-up code of our performance:

https://github.com/daniaezz/liveCoding/blob/main/finalCompositionFunctions.tidal

The evolution of our code can be seen here:https://github.com/ak7588/liveCoding

Someone asked us for the code of the visuals. The bulk of it is P5, the height map is inspired by Shiffman’s tutorial. The height values of the terrain are then multiplied by a factor of the distance from the center (hence the flat part in the middle). Square movement is two sine functions, one for their y positions and the other for their rotation. The sun is the shader in the class tutorial.

Hydra is used for feedback and coloring and the final transition. The transition is a Voronoi-modulated oscillator.

Inspiration for the composition of the visual was drawn from this video.

Here’s the full code. Steps:

  1. run shader
  2. run p5
  3. run for loop
  4. run draw()
  5. run o1
  6. run o3
  7. run render(o3)
  8. tinker with o3 as commented


// glow circle
setFunction({
  name: 'glowCircle',
  type: 'src',
  inputs: [{
      type: 'float',
      name: 'locX',
      default: 0.,
    },
    {
      type: 'float',
      name: 'locY',
      default: 0.,
    },
    {
      type: 'float',
      name: 'glowAmount',
      default: 50.,
    },
    {
      type: 'float',
      name: 'r',
      default: 0.6,
    },
    {
      type: 'float',
      name: 'g',
      default: 0.3,
    },
    {
      type: 'float',
      name: 'b',
      default: 0.5,
    },
  ],
  glsl: `
  vec2 loc = vec2(locX,locY);
  // loc is in screen spaces, but _st is in normalized space
  float dist = glowAmount/distance(_st*resolution, loc);
  return vec4(r*dist,g*dist,b*dist,0.1);
`
})


p5 = new P5({width: window.innerWidth, height:window.innerHeight, mode: 'WEBGL'})
s0.init({src: p5.canvas})
src(s0).out(0)
p5.hide();
scl = 50;
w = 4200;
h = 3000;
//set m as 300
m = 100;
cols = w / scl;
rows = h / scl
flying = 0
terrain = []
spikes = []
toggle = 0
toggle2 = 0
size = 3;
pink = p5.color(255, 34, 240);
blue = p5.color(23, 200, 255);
neon = p5.color(10, 220, 255);
prv = [0,0,0];
ctr = [0,0,0];

p5.remove()

//make electro sound go up with the other one
for (var x = 0; x < cols; x++) {
    terrain[x] = [];
  	spikes[x] = [];
    for (var y = 0; y < rows; y++) {
      terrain[x][y] = 0; //specify a default value for now
      spikes[x][y] = 0;
    }
  }

p5.draw = ()=> {
  blue = p5.color(1, 6, 40);
  m = 100;
  size = p5.random(2,5);
  fade = 0.8;
  //p5.lights();
  p5.background(blue);
  p5.translate(0, 300, -100);
  p5.rotateX(42*p5.PI/72);
  //p5.rotateZ(time*p5.PI / 3);
  //p5.fill(255*p5.noise(1), 190*p5.noise(1), 150 + 200*p5.noise(1), 255);
  p5.translate(-w/2, -h/2);
  p5.noStroke();
  //p5.stroke(255, 34, 240);
  //GRID
  for (var i = 0; i < cols; i++)
  {
    p5.line(i*scl, 0, i*scl, h);
  }
  for (var i = 0; i < rows; i++)
  {
    p5.line(0, i*scl, w, i*scl);
  }
  //p5.noStroke();
  flying -= 0.03;
  var yoff = flying;
  for (var y = 0; y < rows; y++) {
    var xoff = 0;
    for (var x = 0; x < cols; x++) {
      terrain[x][y] = p5.map(p5.noise(xoff, yoff), 0, 1, 0, m) + spikes[x][y];
      spikes[x][y] *= fade;
      //
      xoff += 0.03;
    }
    yoff += 0.04;
  }
  //big blocks
  let cn = 12;
  if (cc[cn] != toggle){
    toggle = cc[cn];
    x = p5.int(p5.random(0.4, 0.6)*cols);
    y = p5.int(p5.random(1)*rows);
    x = p5.constrain(x, 1, cols-size-2);
    y = p5.constrain(y, 1, rows-size-2);
    //spike it up
    for(let i = 1; i < size; i++)
    {
      for(let j =1; j< size; j++)
      {
        spikes[x+i][y] = ccActual[cn]*55;
        spikes[x+i][y] = ccActual[cn]*55;
        spikes[x+i][y+j] = ccActual[cn]*55;
        spikes[x][y+j] = ccActual[cn]*55;
      }
    }
  }
  //sharp spikes
  let cn2 = 10;
  if (cc[cn2] != toggle2){
    toggle2 = cc[cn2];
    x = p5.int(p5.random(0.4, 0.6)*cols);
    y = p5.int(p5.random(1)*rows);
    //spike it up
    spikes[x][y] = 105*ccActual[cn2];
  }
  //terrain
  for (var y = 0; y < rows - 1; y++) {
    //left side
    p5.fill(blue);
    //p5.noFill();
    //p5.stroke(pink);
    p5.noStroke();
    p5.beginShape(p5.TRIANGLE_STRIP);
    for (var x = 0; x < cols-1; x++) {
      let dist = p5.pow(x-cols/2,2)/20;
      p5.vertex(x * scl, y * scl, terrain[x][y]*dist);
      p5.vertex(x * scl, (y + 1) * scl, terrain[x][y + 1]*dist);
    }
  	p5.endShape();
    for (var x = 0; x < cols-1; x++) {
      p5.strokeWeight(10);
      p5.stroke(pink);
      if (x%10==0)
      {
        p5.stroke(neon);
      }
      let dist = p5.pow(x-cols/2,2)/20;
      p5.line(x*scl, y*scl, terrain[x][y]*dist, x*scl, (y+1)*scl, terrain[x][y+1]*dist);
      //p5.line(x*scl, y*scl, terrain[x][y]*dist, (x+1)*scl, (y)*scl, terrain[x+1][y]*dist);
    }
  }
  //translate
  p5.strokeWeight(5);
  p5.stroke(neon);
  p5.fill(pink);
  //central box
  p5.push();
  p5.translate(w/2,2300, 70 + 40*p5.cos(flying*7-3));
  p5.rotateX(-flying*3);
  p5.box(50 + ccActual[13]*0);
  prv[0]=cc[12];
  p5.pop();
  //box left
  p5.push();
  p5.strokeWeight(7);
  p5.translate(w/2-100,1700, 100 + 60*p5.cos(flying*7-1));
  p5.rotateX(-flying*3 - 1);
  p5.box(50 + ccActual[13]*0);
  prv[1]=cc[11];
  p5.pop();
  //box right
  p5.strokeWeight(10);
  p5.push();
  p5.translate(w/2-60,100, 80 + 60*p5.cos(flying*7 - 6));
  p5.rotateX(-flying*3);
  p5.box(50 + ccActual[13]*0);
  p5.pop();
  //box left2
  //box center
}

//o0
src(s0).out(o0)

//MY GPU CANTTT
osc(1,2,0).color(10, 10,10).brightness(-100).modulate(noise()).mask(src(o0).sub(osc(0.9, 0.4).modulate(voronoi(20,10), 0.9))).add(src(o0)).invert().out(o1)

//final output [MAIN VISUAL]
//option1: modulate by o0, become crystalline/transparent: v pretty
//option2: blend multiple times o3
//option3: switch source to o1, this is the main function then blend with o3.
src(o0).layer(glowCircle(31*p5.width/70, 7*p5.height/24, ()=> ccActual[13]*100+2500, ()=>0.3, 0.1 ,0.06)).blend(o3).out(o3)

render(o3)

//black screen
//track 1 => automatically switches
//build up => bring the sun out || sun moves
//drop the beat => sun automatically detects that
//on drop => o1
//modulate o(0) blend o3
//o1 source then hush

hush()


Group Members: Eadin, Omar, Sarah

For our drum circle project, we started by getting together and deciding on the kind of feel and impact we were going for. We all agreed that an ambient sound matched with a retro look is our goal. Then, we went through our previous projects and found sounds that we already like or feel like would suit what we want to do. Then we experimented with them and tried new stuff. 

For our workflow, we didn’t particularly divide roles. Instead, we would meet in our usual classroom, jam, and give tasks to each other as we worked. But in general, Sarah focused more on audio and compositional structure, Omar did more with visuals, and Eadin looked more into audio and midi interaction. 

Working in a group this time has been an exciting experience, as it felt like we had more possibilities with 3 brains focusing and trying to put something together. It was also helpful to learn from each other and see how each of us tackles issues that came up with the code. Having more than one person genuinely helped with debugging as we tend to overlook the problems with our own code but with flok we had to resolve everything to make sure we had something on the screen. However, improvising from scratch remains a little bit of a challenge. We all found ourselves to be interested in kicking off our performance with something already complex and building on top of it every time we meet, which still does not leave much room for improvisation and chance. Hopefully, through the class-wide drum circle, we would see how others jump in and contribute, getting some examples of unplanned improv.

For next week’s assignment, although we already kind of developed a build-up this week, we are thinking of trying something new and playing with new sounds, maybe bringing in our own vocal samples!

Here’s a snippet of the composition code we attempt to live code with:

d8 $ qtrigger 8 $ seqPLoop[
--
(0,9.5, off 0.125 (# squiz 4) $ fast 1 $  s "sid" >| note (scale "minor" ("<[3,5,7] [4,2]>(5,8)"+"<2! 3 4>"+"f")) # gain (range 1.2 1.3 perlin) # room 0.5 # djf (range 0.3 0.4 perlin) #hold 0.1 # size 0.9),
(4,9, loopAt 1 $ sound "breaks125:1(5,8)" # legato 7 # room 0.25 # vowel "o"),
--break // everything off to build tension
--- come back faster / build up-ish
(12,13, s "gab:9(40,8)" # gain (range 0.5 1 saw) # speed (range 0.8 2 saw) # cut 1),
(11,12, s "cp*4" # room 0.6),
(12,13, s "cp*16" # room 0.6) ,
(13,24,off 0.125 (# squiz 4) $ fast 1 $  s "sid" >| note (scale "minor" ("<[3,5,7] [4,2]>(5,8)"+"<2! 3 4>"+"g")) # gain (range 1.2 1.3 perlin) # room 0.5 # djf (range 0.3 0.4 perlin) #hold 0.1 # size 0.9),
(13,23 , loopAt 1 $ sound "breaks125:1(5,8)" # legato 7 # room 0.25 # gain 0.8),
--still needs a smoother breakdown/slow down--
(24,30, off 0.125 (# squiz 4) $ fast 1 $  s "sid" >| note (scale "minor" ("<[3,5,7] [4,2]>"+"<2! 3 4>"+"f")) # gain (range 1.2 1.3 perlin) # room 0.5 # djf (range 0.3 0.4 perlin) #hold 0.1 # size 0.9)
]

     Our project includes multiple visual and audial experiences generated through Tidal, Hydra, and midi-communication done via a Flok server. As outlined in class, the heart of our project is improvisation and active listening to what is happening in the process.


     This is how we worked together: we met multiple times and IMPROVISED. For our first session, we started from scratch and just improvised, seeing where it took us. We found a jamming style that worked for our group, and it was splitting into groups of two in the beginning and then mixing it up towards the middle and end. This way, we could carefully listen and observe what was happening and adjust accordingly. Shreya and Dania were on Hydra, while Amina and Thaís were on Tidal. Each of us was creating simple shapes and beats, which were then used to build up to create a more complex composition. When midi was added and the audio-visual experience was past the beginning stage, each of us had the freedom to choose which part to modify, i.e. one could switch to Hydra, Tidal, or continue building up on the same part they were working on. We also helped each other with their codes or parts that were confusing and actively listened to each other to see what to add and when to trigger it to make a cohesive composition. Each subsequent time we met, we used our past code to experiment with and improvise on (assuming it to be another team’s code that we would be working with). Every time we practiced, we created a unique composition. 


     Below are a few pictures from our practice sessions:


     The complete set of our works can be found in this repository: https://github.com/ak7588/liveCoding       

     Our favorite jamming session was the following one, which we will also be presenting in class:


     P.S. – This was one of the highlights of our semester(<3<3)!!!!!!! Livecoding with others is such an amazing bonding experience: we went in as individuals and came out as a performance group.

And we also came to the conclusion that Tidal-Hydra >>>> Hydra-Tidal. The world came back to its senses. 😉


Group Members: Aalya, Alia, Xinyue, Yeji

Inspiration

Each of us brought a few visuals and sound samples together. Then we tried to adjust the parameters and midi so that the theme of the visuals and sounds matched with each other.
Who did what:

  • Tidal: Aalya and Alia
  • Hydra: Xinyue and Yeji

Project Progress

Tidal Process

  • First, we played around with the different audio samples in the “dirt samples” library and tested out code from the default samples table on the documentation on the official Tidal website.
  • We then mixed and matched several combinations and eliminated everything that didn’t sound as appealing as we wanted it to be.
  • As Yeji and Xinyue were working on the visuals on the same flok, we listened to all of the various soundtracks as we took the visuals into account and were able to narrow down all our ideas into one singular theme.
    We had a lot of samples that we thought worked well together, but we were lacking structure in our track, so that was the next step when working on the project.
  • We broke down the composition into four sections: Intro, Phase 1, Phase 2, and Ending.
  • After that, it was just about layering the audio in a way that sounded appealing and that transitioned smoothly. We were trying to figure out what sounds would be used when transitioning into a new section and what parts would be silenced. It was all about finding the balance and a matter of putting together tracks that worked well with the visuals and complimented them.


Hydra Process

  • We started with a spinning black and white image bounded by a circle shape. Our inspiration comes from the old-fashioned black-and-white movie.
  • We modified the small circle by adding Colorama, which introduces noise
  • .luma() introduced a cartoon effect to the circle, and reduced the airy outlines
  • The three other outputs depended on the o0 as the source.
  • We added an oscillation effect on top of the original source and added cc to create a slowly moving oscillating effect that goes with the music.
  • Then, the scale was minimized for a zoom-out effect as the intensity of the music built up.
  • For the final output, the color was intensified, along with another scale-down effect, before introducing a loophole effect that transitioned back into o0 for the ending scene.

Evaluation and Challenges

  • Some of the challenges that we encountered during the development process of the performance were coordinating a time that worked for everyone and making sure that our ideas were communicated with each other to ensure that everyone was on the same page.
  • Another issue we had was that the cc values were not reflected properly, or in the same way for everyone, which resulted in inconsistent visual outputs that weren’t in sync with the audio.
  • Something that worked very well was the distribution of work. Every part of the project was taken care of so that we had balanced visual and sound elements.