For the research project, the live coding platform that I picked is Motifn. Motifn enables users to make music using JavaScript. It has 2 modes: a DAW mode and a fun mode. The DAW mode lets users connect their digital audio workstation, like Logic, to the platform, by which a user can orchestrate synths into their DAW using JS. The fun mode on the other hand lets you start producing music in the browser right away. I used the fun mode for the project.
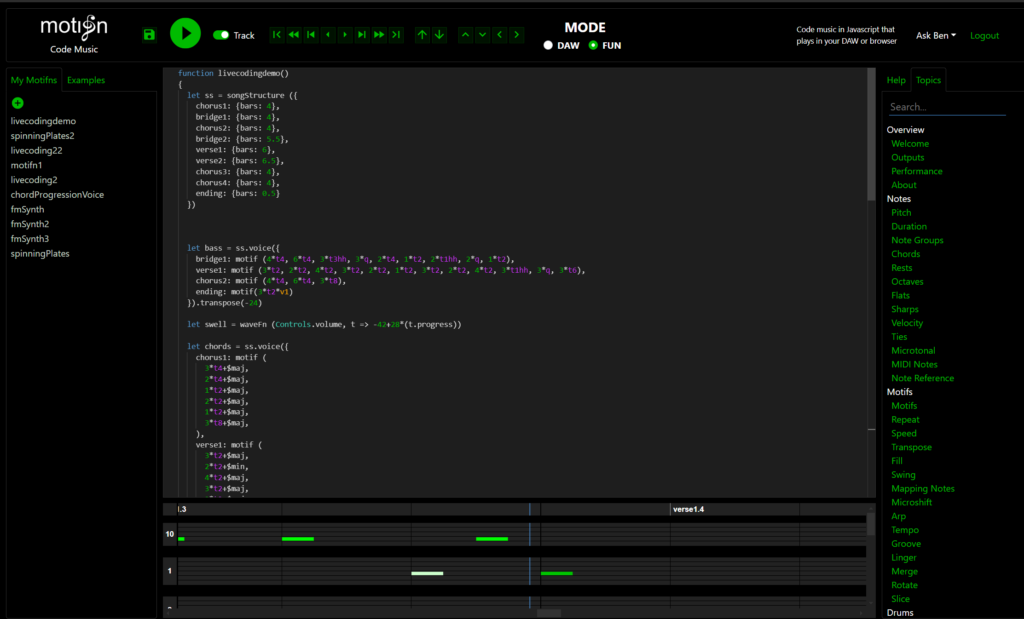
The coolest feature about Motifn is that visualises the music for you. Similar to how we see the selected notes in a MIDI region in Logic, Motifn lays out all the different tracks along with the selected notes underneath the code. This allows the user to better understand the song structure and is an intuitive way to lay out the song which makes it user friendly.
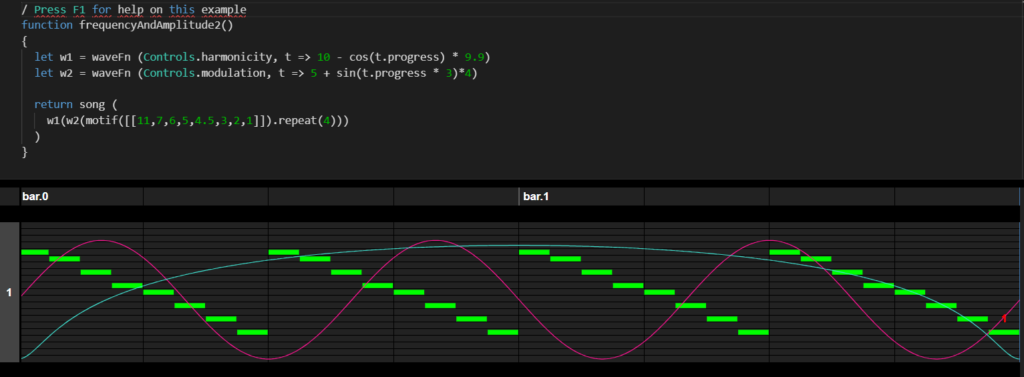
To get started, I started reading the examples on the platform. There is a long list of examples right next to the coding section on the website. All of the examples are interactive, which makes it easier to experiment with different things. Since it is right next to the coding section of the website it is also convenient to try out a lot of examples because there was no need to open different tabs to refer to the documentation. Having an interactive, short, and to-the-point documentation enabled me to experiment with different things Motifn has to offer.
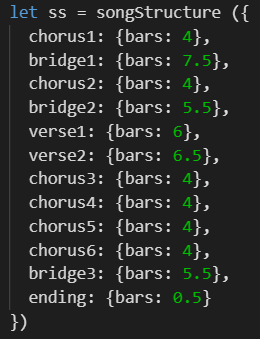
After playing around it for a while, I discovered that the platform let’s you decide the structure of the song before you even finish coding the song itself. So, using the let ss = songStructure ({}), I decided to a song structure.
Motifn has a lot of synth options (some of them made using Tone.js) and I am huge fan of synths. So I started my song with that. Followed by the addition of bass in the first bridge, synth + bass + notes in 2nd chorus, bass + hihats in the 2nd bridge, kicks + snare + hihats + bass + chords in the first and second verse, remove the drums in the third chorus and then bring them back in the next one. After that I just take out thre instruments one by one and the song finishes.
Here is the demo of what I made on Motifn.
There isn’t a lot of information about Motifn online. I was unable to find the year it was developed in or even the founders. I would place this platform somewhere in the middle of live coding and DAW music production. I felt as if there was less flexibility to experiment and make music on the fly as compared to TidalCycles. Motifn seems more structured and intentional. But there are a lot of cool sounds and controls on the platform, like adding groove to instruments making it play either behind (like we read in class) or ahead of the beat by a few ms or modulating the harmonicity of a synth over time. Its integration of JavaScript for music composition makes it accessible to a broad range of users which reflects the live coding community’s values of openness and innovation. Overall, it is a fun platform to use and I am happy with the demo song that I made using Motifn.

