Description

The coding platform I chose for this research project is Mercury. Mercury is a “minimal and human-readable language for the live coding of algorithmic electronic music.” It’s relatively new as it was created in 2019 and is inspired by many platforms that we have used or discussed before. Mercury has its own text-editor that supports sounds and visuals, however, since it’s made for music, I decided to dive deeper into that.

Process

Since the documentation on the music features in Mercury is not very thorough, it was better for me to learn and understand through example files and code that can be randomly chosen from the text-editor. I then went through the different sound samples and files available and tested them out on the online editor as it allowed me to comment out code and click and drag whenever I needed to. After reaching a final result that I liked, since it was the first time I tested these files, I started implementing similar code in the Mercury text editor. It did not sound exactly the same and so I made sure to make changes that would make it sound better.

One of the randomly chosen files that I came across had the following instruments and I used that for inspiration while changing it and adding more to it:

new sample kick_909 time(1/4)
new sample snare_909 time(1/2 1/4)
new sample hat_909 time(1/4 1/8)
new sample clap_909 time(1/2)

Below is a video of the “live coding performance” (that I had tested out):

Evaluation

Although Mercury had audio samples and effects that sounded really nice and allowed for experimentation as well as mix-and-matching, there were a few aspects that I am not a huge fan of. These include the limited documentation on the sounds and how they could be used, the fact that you can’t execute line by line but rather the whole file at a time, and the fact that you cannot use the cursor to move to another line or select text. However, it was an enjoyable software to explore and engaging when it comes to the text resizing as you type and reach the end of the line.
(Before I decide to use speccy as my project target, I chose mutateful and ossia score. However, mutateful is a tool based on a paid, powerful but complex platform called Ableton live. As for Ossia Score, it says its free and open source, while it asks you to pay 60 dollars only if you want to download it on Windows.)

Speccy actually doesn’t have fancy main pages. It is a live-coding tool made by Chris McCormick, who seems interested in making games and code-generated music. According to the simple documentation and a short demo video, it doesn’t have complex functions, but things like

(sfxr {:wave :square
:note #(sq %
[36 -- -- 41]})

to adjust when and in what pitch the digital note will occur.

However, that doesn’t mean the tool is useless. The tool is bonded with another tool made by the author called jsfxr, to make 8-bit sounds and generate SFX. You can easily access it to get some prefabbed sound effects like coin or jump sound, or you can adjust the parameters to have the different sound effects you want.

Then, you can copy the code and paste it into Speccy like this:


(sfxr "34T6PkkdhYScrqtSBs7EnnHxtsiK5rE3a6XYDzVCHzSRDHzeKdFEkb7TSv3P3LrU7RpFpZkU79JLPfBM7yFg1aTfZdTdPR4aNvnVFWY6vqdHTKeyv8nSYpDgF"
{:note #(at % 16 {0 5 1 27 8 24 14 99})})


And you can make this sound you made just now to occur in your live coding at a certain time and in certain pitches. And you can adjust it with some other parameters too.

Then I will show you what I randomly made with the two tools, hope you can enjoy it. (I’m not using magic but using the clipboard to paste the codes!)

For my research project, I decided to go with Gibber. Gibber is a live coding environment for audiovisual performance. It is a program based in Javascript that works by dynamically injecting realtime annotations and visualizations into a programming environment for a live coding performance.

There are a few things that stood out to me regarding Gibber. First, is the fact that it is in JavaScript. It made understanding the syntax of the code way easier. I may not have been particularly familiar with the actual application, but because I understood what the syntax of JavaScript, I was able to piece things together and make sense of the bigger picture. The documentation was also quite extensive, which is something that really helped me in understanding the core concepts of this program. The second things that particularly stood out to me, was the interface used to execute the code. You can see this through the link attached below but I really enjoyed how there were different elements on the screen being highlighted, to indicate which part of the code was being currently executed. It is a small addition, but I really feel like it ties everything in together, especially from a users perspective. Finally, it is quite versatile in the sense that it allows for the incorporation of external audiovisual libraries such as: p5.js, tidal, Hydra, and more.

Overall, I find Gibber to be an extremely useful tool that is quite developed. I really enjoyed playing around with the different settings and it was a fun experience.

Gibber Playground – Try and experiment for yourself!

LiveCodeLab is a web-based livecoding environment for 3D visuals and sound that are created on the spot without evaluating of lines of code. The project was built on top of of the Code Mirror editor by Marijin Haverbeke and the live coding framework Fluxus by the Pawful collective. A lot of the infrastructure, logic and routines are inspired from computer web-based computer graphics libraries like three.js and processing.js.


I thought this project was really interesting in the way that it removes the traditional frustrations of programming from the workflow, thus making it an optimal entry point for visual artists with no programming experience. Its facility to pick up and simple same-window on-the-go live tutorials make it a great tool for early prototyping. In LiveCodeLab, code is evaluated as it is typed. So code that doesn’t make sense is simply not implemented, while other lines are evaluated–no delay whatsoever.


The Github isn’t very well documented but I’m assuming that as opposed to Hydra it isn’t based on shaders but rather a live canvas updated frame by frame through the CPU. This makes it noticeably slow when shapes become more complex (I’ve done some testing and the window crashes at 100 cubes rotating on an M1). But you have to take it for what it is: a prototyping and educational tool.

The program I chose for this research project is Vuo.


Vuo was originally designed after Apple’s Quartz Composer (QC), which was released in 2005. The producers of Vuo felt like Apple’s QC was not growing or improving and therefore decided to create a program that could carry out the same functionality as QC and more. It was first released in 2014 and has grown to have a large community. 


Vuo allows its users to create visual compositions using a node programming method, which makes its GUI very user friendly and can be used with little to no prior experience in coding. If needed, Vuo also allows its users to manipulate shader code and add shaders from the web, which makes it suitable for both beginners and professionals. Although Vuo does not have a way of composing music in the program, it has some music processing capabilities which makes it a very appealing platform for music visualization projections and performances. It is also used for projection installations and performances as it has a built-in function to project a composition onto a dome or other surfaces. I think it’s also important to note that Vuo can also be used to create and manipulate 3D graphics, images and videos.


There is definitely a lot to unpack in Vuo, but I decided to focus on creating a 2D composition. What I liked the most about Vuo is the ability to see how everything connects and what the effect each node has on the image. One thing I noticed is that there is a small lag each time a node is connected, which causes the program to stop for a bit, making the transition between effects unnatural for live coding. 


Final Performance:

https://youtu.be/mJOZnfs2GiI

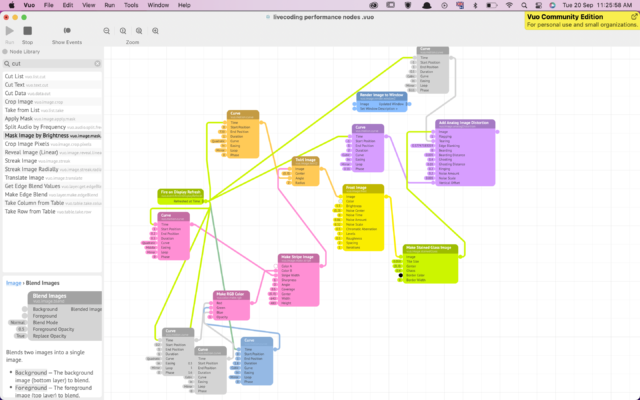
Nodes used:

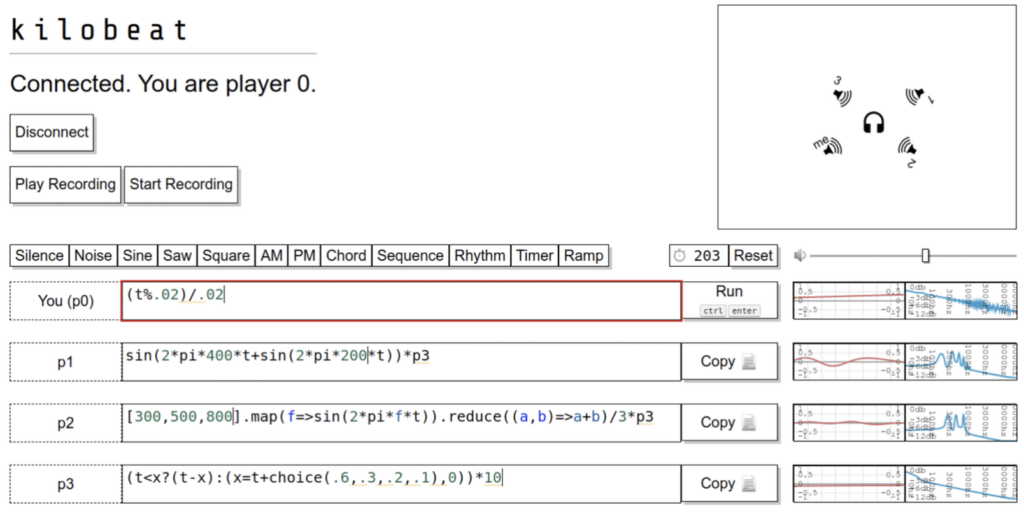
Kilobeat is a collaborative web-based dsp (digital signal processing) live coding instrument, with aleatoric recording (applies when a random function is used) and playback. The user interface is as follows. Each row represents a connected device

Kilobeat Main Interface

There was no one in the main server every time I connected, so I took the entire server for myself during the experimentation. I opened four different tabs on my browser and tested running different functions for each tab. There are default functions available as tabs (Silence, Noise, Sine, Saw, …), and each function can be combined to produce new sounds. Some examples are layering (addition), amplitude modulation (multiplication), function composition (passing in one thing as an argument to another). The players can look at the oscilloscope and the spectrum analyzer to visualize their output.

I found the output created by kilobeat limiting, compared to supercollider. It was also quite difficult to make the piece sound enjoyable to the ear. The strength of the platform, it seems, lies in offering users with an easy collaborative experience on the web, which made me wonder whether there was an option on atom for real-time online collaboration. If so, although I appreciate the conceptual idea behind kilobeat, I personally would not use the platform again.  

So, what is Mosaic?

Mosaic is an open source multiplatform live coding and visual programming application based on openFrameworks! (https://mosaic.d3cod3.org/)

The key difference is that it integrates two paradigms: visual programming (diagram) and live coding (scripting).

History

Emanuele Mazza started the Mosaic project in 2018, in strict relation with the work of ART+TECHNOLOGY research group Laboluz from the Fine Art faculty of the Universidad Politécnica de Valéncia in Spain.

Mosaic even has its own paper published here: https://iclc.toplap.org/2019/papers/paper50.pdf

The goal of Mosaic really is to make live coding as accessible as possible by giving it a seamless interface and minimum coding requirements:

It’s principally designed for live needs, as can be teaching in class, live performing in an algorave, or running a generative audio-visual installation in a museum. It aims to empower artists, creative coders, scenographers and other creative technologists in their creative workflow.

Source: https://mosaic.d3cod3.org/

Mosaic Interface + Experience

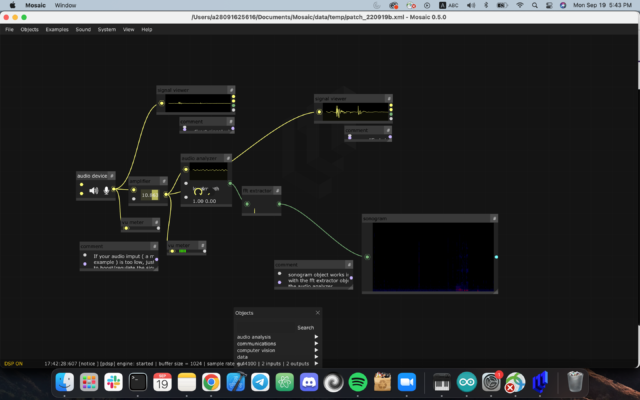
Mosaic interface is easy to navigate because it has functional blocks that can be connected with each other. For example, if I have a microphone input, I can then amplify the sound and connect it to the visual output straight away, like my project below:

Technical Details

Mosaic can be scripted with Python, OF, Lua, glsl and bash. In addition, pure data live-patching capability, and a selection of audio synthesis modules, multiple fullscreen output windows capabilities.

Mosaic is mainly based on two frameworks : OpenFrameworks and ImGui. OpenFrameworks is an open source C++ toolkit for creative coding.

Get started with Mosaic

To download Mosaic, head to the website instructions here.

You can start with a few built-in examples and see tutorials on Vimeo.

My experience and project

As I found out, there are not that many resources available on getting started with Mosaic. There is good documentation on the website and associated GitHub repository, but not that many independent creators who share their projects in Mosaic online, as compared to its parent tool openFrameworks (OF).

Because I have some background in OF, it was manageable to understand the coding mechanics in Mosaic, but it took some time to understand how to produce live coding that is not result of random gibberish with noise and my microphone’s input.

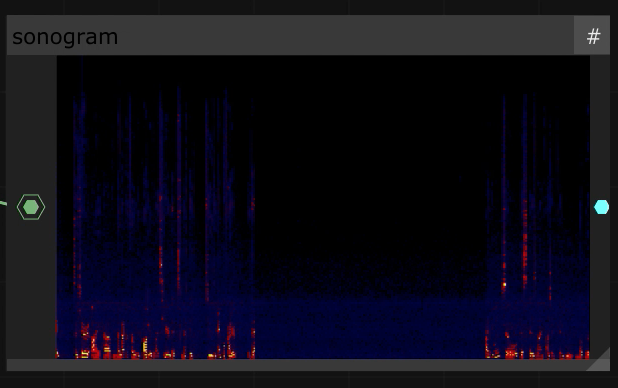
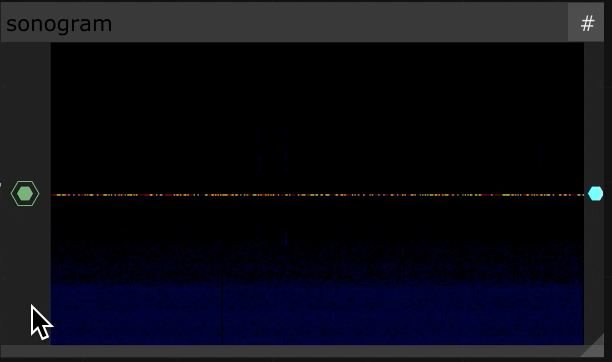
What I ended up testing in the end is creating visual output with Sonogram based on my microphone input.

Watch my examples:

  1. https://youtu.be/IXW6jBlr85I (audio and visual output)
  2. https://youtu.be/xm02jKemx2c (video input and visual output)
  3. https://youtu.be/5ofT4aOYJoI (audio and visual output)

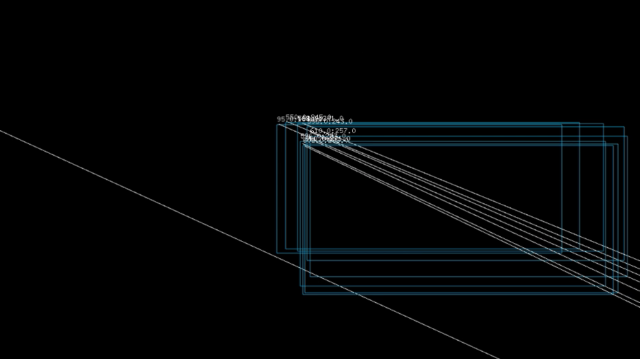
And corresponding visuals that were created in the process from above:

Finishing thoughts

Mosaic provides an understandable GUI to see what’s happening with the code, audio, and visual output. My main challenge as a beginner was finding ways to make output make sense — coming up with code and block connections that would create a cohesive generative visual at the end.