Overview

The process of creating our final performance was a very hectic but rewarding experience! We had a lot of fun working together and combining all our ideas to create one cohesive piece. We experienced several challenges along the way, such as difficulty matching the visuals with the sounds, and also combining the buildups with the beat drops in a way that makes sense, but we got there in the end! We found it hard to split the work into sections and then each working on our sections, so our approach to creating our final piece was to work on everything together. For example, Louis took charge of creating the music, so Shengyang and Debbie would support Louis during this process and offer feedback instead of working on other things (Debbie took charge of Hydra and midi while Shengyang took charge of p5.js). This definitely prolonged the process of creating the final performance, but we found that working this way made the final result feel more cohesive. If we could work on this project again, we would first choose a theme so that we’d be able to split the work into sections and successfully combine our work to make a cohesive piece. Overall, we are very proud of how far we have come! It was an amazing experience working with the team, everyone in the class, and Professor Aaron! We learned a lot of skills that we will continue to use in the future!


Debbie’s part:

For our final performance, I focused mainly on creating visuals (with Shengyang) and tying the whole piece together. Initially, I created the following visual with p5.js. 
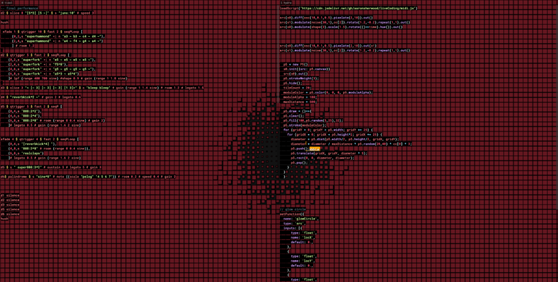
I really liked this visual because I liked how the size of the hole in the centre could be manipulated to mimic the vibrations on a speaker, or even a beating heart. But my issue with it was that I found it difficult visualising what I could do with the visual other than changing the size of the hole. I tried changing the shapes from squares to something else or combining them with the hydra, but nothing felt right. I wanted to create a visual that could be used throughout the whole piece and changed in unique but cohesive ways. So, a week before the performance, I decided to change the visuals from this to the following:
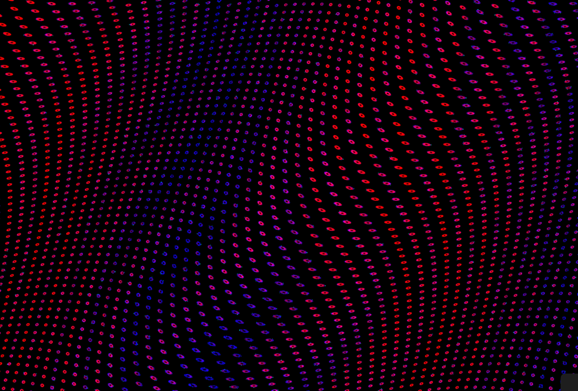
What I loved about this visual is that the code was so straightforward, and little changes to it could change the visual in huge ways that still remained cohesive. This visual was made completely with Hydra. Here is a snippet of the code:


osc(215, 0.1, 20)
.modulate(
  osc(2, -0.3, 100)
  .rotate(15)
)
.color(0.9, 0.0, 0.9 )
.modulate(
  osc(6, -0.1 )
  .rotate(9)
)
.add(
  osc(10, -0.9, 900 )
  .color(1,0,1)
)
.mult(
  shape(900, (()=>cc[1]/4), 0.5)
  .luma()
    .repeatX(()=>cc[3]*100)
    .repeatY(()=>cc[3]*100)
  .colorama(10)
)
.modulate(
  osc(9, -0.3, 900)
  .rotate(()=>cc[0])
)
.out(o0)

Louis’ part:

Like Drum Circle, I basically take charge of the music part of our final work. This is because personally speaking, I am more enthusiastic about making music and have also accumulated some experience creating music via Tidal. In the process of making this final piece, I was inspired by other works, including some works on Garageband (very brilliant works they are but are quite difficult to be realized by using Tidal), the beat-box videos Aaron recommended we watch, and of course our own works (namely the Drum Circle). For me, the most critical parts of this work are the two drops. We spend a lot of time making the two drops to have a good effect of carrying on the top and starting the follow-ups. Take the second drop as an example, we crossed-use the two main melodies (one is the main motif of the main work, and the other one is the melody played at the end. By doing this, I believe we have managed to tie the previous content together and enhance the rhythm of the drop section very effectively (based on the reaction of the audience during the live performance, this section should be quite successful).

I want to thank my two lovely teammates Shengyang and Debbie, they gave a lot of useful advice on how to make the melody as well as make the whole structure of the music part make sense. I also want to thank Aaron for providing great suggestions on improving especially the first drop (at first we have a 16-shot 808 which makes itself more like the drop part than the real one).

Without their help, I won’t be able to realize this work alone.


Shenyang’s part:

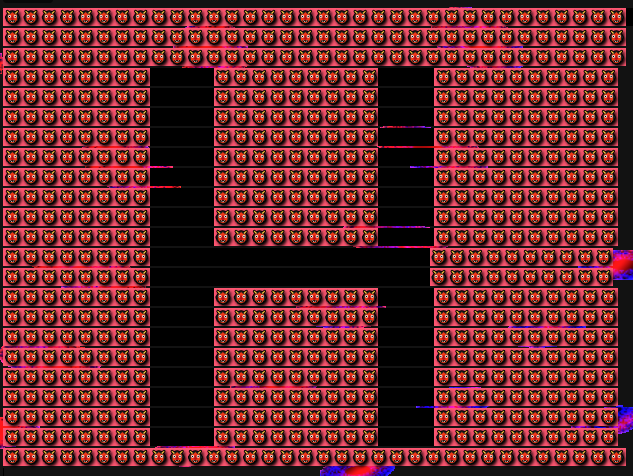
In the final project, I am mainly responsible for the production of the p5.js part. I was also involved in some musical improvements and a part of the abandoned visuals. I will mainly talk about the p5.js part we realized and put in the final performance. First, we used laser beams, which are realized in p5.js. This effect is added to the top layer of the original hydra section in the second half of the show. This is a screenshot of a combination of the laser beams from p5 and hydra.

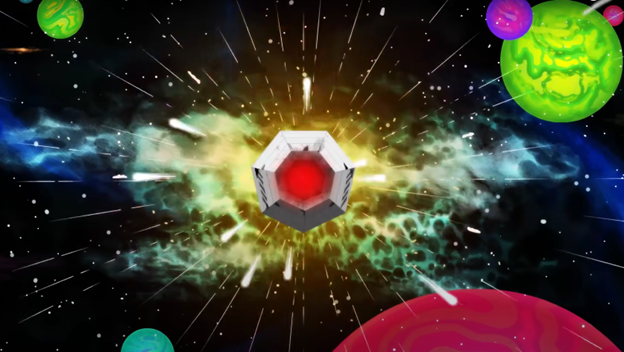
The laser beam effect is actually inspired by the MV of A L I E N S by Coldplay that Louis showed us, you can find the MV here, and the laser beam appears at about 2:30. This is the laser beam in the MV:
I used a class to store the location and direction of each beam:


 class RayLP {
  constructor(x, y, startAngle) {
    this.originX = x;
    this.originY = y;
    this.distance = 0;
    this.angle = startAngle;
    this.stillOnScreen = true;
    this.speed = 1;
    this.length = p2.floor(p2.random(8,17));
    this.color = p2.random(0,1);
  }
  move() {
    this.distance = this.distance + this.speed;
    this.speed = this.speed + this.distance / 350 + ccActual[9];
  }
  check() {
    this.stillOnScreen = (this.distance < width / 2);
  }
  destroy() {
    delete(this);
  }
  show() {
    p2.push();// remember the fill and stroke before
    if(this.color > 0.5){
    p2.stroke(220,65,255, 180 - this.distance);}//, 255 - this.distance * 2);}
     else{p2.stroke(139,0,50);}
    p2.strokeWeight(9);
      if (this.stillOnScreen) {
      for (var i = 0; i < this.length; i++) {
        var x = this.originX + (this.distance + i *2) * p2.cos(this.angle);
        var y = this.originY + (this.distance + i *2) * p2.sin(this.angle);
        var xTo = this.originX + (this.distance + i * 10 ) * p2.cos(this.angle);
        var yTo = this.originY + (this.distance + i * 10 ) * p2.sin(this.angle);
        p2.line(x,y,xTo,yTo);
      }
    }
    else{this.destroy();}
    p2.pop();  //restore fill and stroke
  }
}

And in the p5 draw function, each frame the program will show and check, and push new laser beams into a list. We finally changed the color/stroke to dark purple and dark red just like the background. After building the hydra function on the laser beam effect, it can twist like the background dots, which makes the effect less abrupt.

Notably, I had some silly errors in my p5 code, and Omar gave me some very inspiring advice. Thanks a lot for that! Also, there was no delete(this) part in the class code at the beginning, which doesn’t cause any obvious problems in the p5 editor. But when migrated to hydra, whether used in Atom or in Flok, it quickly fills up memory. This can make the platform stuck or slow to respond.

I was also in charge of realizing the visuals for the surprise Merry Christmas session at the end. This is migrated from the Examples of p5.js that can be found here.

The syntax for declaring classes this way doesn’t seem to be very acceptable in hydra, so I’ve replaced it with a more common way of writing it that is acceptable to the hydra.

I really enjoyed the class, very intellectually stimulating. Thank you so much to professor Aaron, my teammates, and my lovely classmates! I will miss you guys!

You can find videos of our performances here:

Last but not least:

once $ s “xmas” # gain 1.2 # room 1.5


This is the recorded video of our project:

Louis:

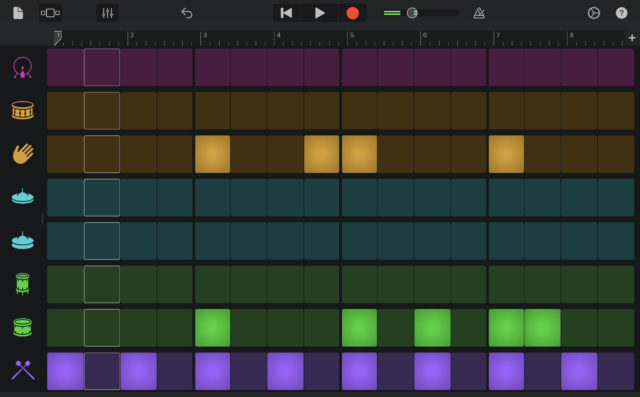
  I am basically taking charge of the music part of the drum circle project. Because I knew before that the process of making the drum circle on Garageband is well visualized, which can help the team to make a good beat more easily, I chose to use Garageband. The process was really fun as I also enjoyed listening to my works when making them. 

Eventually, I chose one of the works: 

d2 $ s "hh*8" # gain 1.2

d3 $ fast 2 $ s "feel [~ feel] feel [feel ~]" # gain 1.2

d4 $ fast 4 $ s "~!4 808:3 ~!3"

d5 $ fast 2 $ whenmod 4 2 ( # s "hardcore:11 ~ hardcore:11/2 ~!4") $ fast 4 $ s "[hardcore:11 ~!3]!2" # gain 1.5

  These sounds remind me of the game music in the arcades back in the old days. After letting all of the members in our group listen to the samples, Shengyang and I started to make them in Tidalcycle. Thanks to the visualized beat pattern, it was much easier for us to know how the rhythm is like, which helped us to eventually make the music. 


Debbie:

  For the Drum Circle assignment, Louis, Shenyang, and I split the work into three parts: Tidal, Hydra, and P5. I was responsible for creating the P5 visuals, which we decided we would use as the base visual that any other hydra visuals would be added onto.

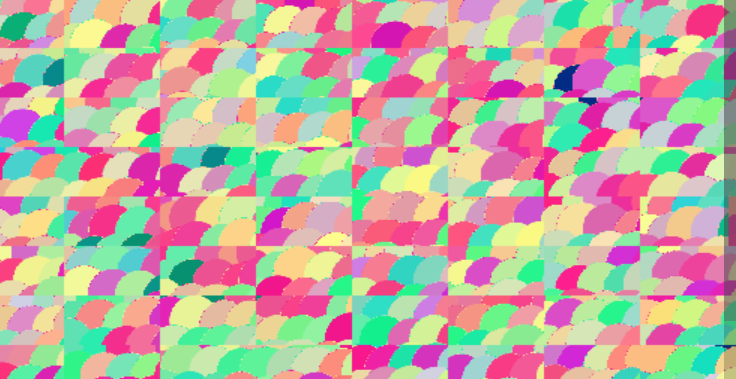
  I approached this by creating a very simple visual of overlapping circles. Then, I added some noise to each circle so they wouldn’t be static. Finally, in line with the colour scheme (pinks, purples, light greens and blues), I used the ‘random’ function to add variation to the colours of the circle:
  You can find the schematic gif here


Shengyang:

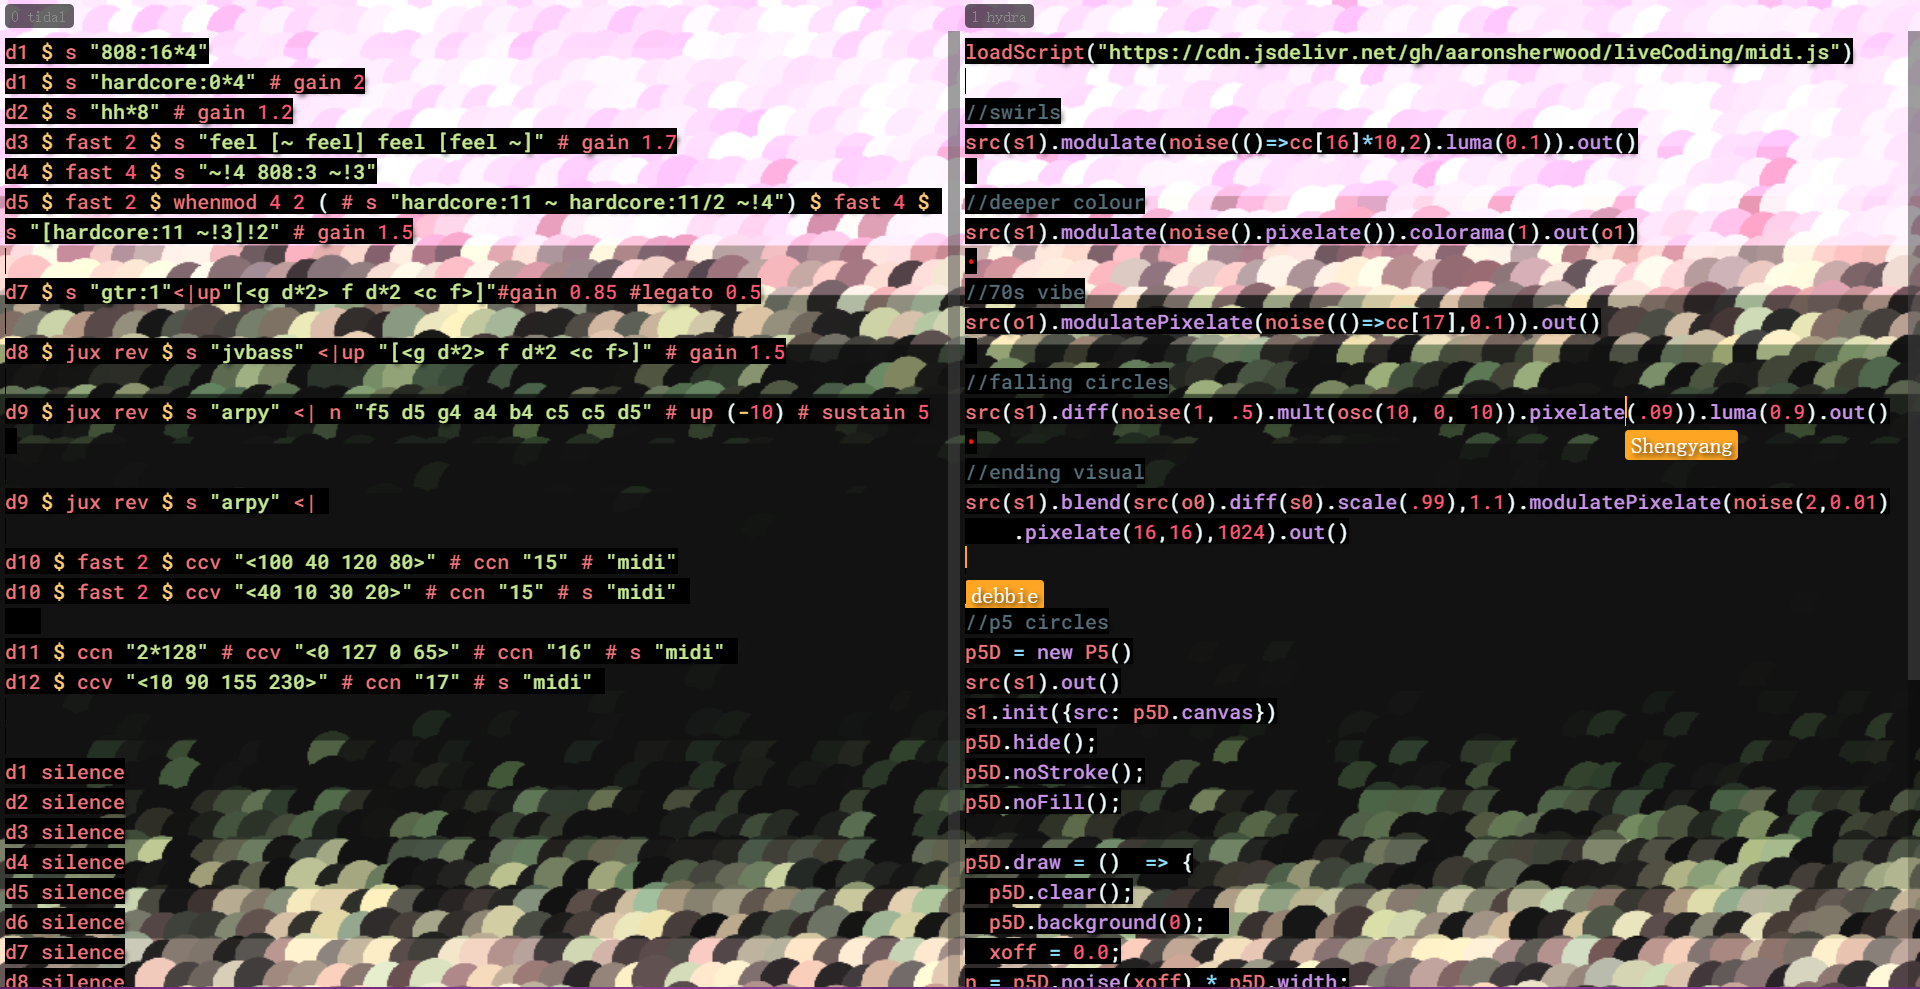
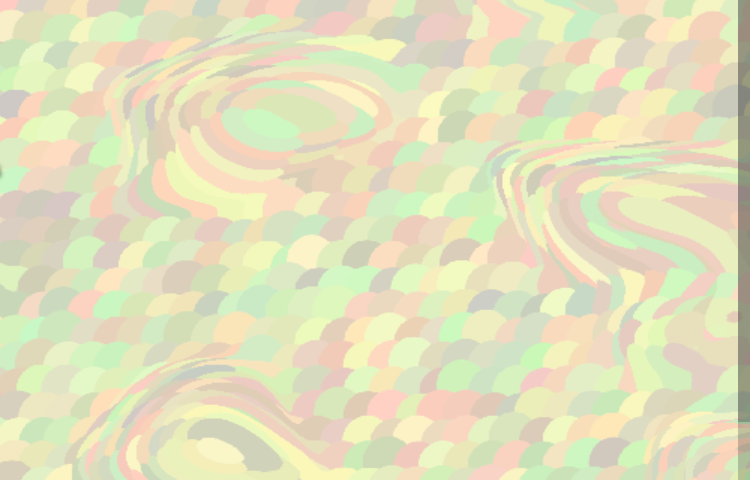
  Based on the p5 visuals made by Debbie, I made some hydra effects to make the dot matrix flow.

The codes with effects are below:

dot matrix 1


//swirls
src(s1).modulate(noise(()=>cc[16]*10,2).luma(0.1)).out()
 
//deeper colour
src(s1).modulate(noise().pixelate()).colorama(1).out()
​
//70s vibe
src(o1).modulatePixelate(noise(()=>cc[17],0.1)).out()
 
//falling circles
src(s1).diff(noise(1, .5).mult(osc(10, 0, 10)).pixelate(.09)).luma(0.9).out()
​
//ending visual
src(s1).blend(src(o0).diff(s0).scale(.99),1.1).modulatePixelate(noise(2,0.01)
    .pixelate(16,16),1024).out()


First of all, unfortunately, I have not participated in or tried meditation in the professional sense. So I can’t really draw any conclusions on the difference between Sonic Meditation and other meditations.

What makes me feel interested is the way how Oliveros’s Sonic Meditation going:

“Take a walk at night. Walk so silently that the bottoms of your feet become ears.”

  1. Mirror

  2. Kinetic Awareness—Make your last audible breath a sung tone

  3. Circle—Visualize your signature letter by letter slowly. Simultaneously hearing your name. Do this forward, then backwards. (Without sound) See your signature in a selected color. Do these with eyes closed and eyes open.

  4. Bowl Gong Meditation. If you lose track of the pitch or want to verify your memory hit the gong again.

  5. Walk once around the room as slowly as possible backwards

  6. Teach yourself to fly as long as possible

What Oliveros did was very similar to games in a broad sense. And these ways just remind me of a book called Grapefruit by Yoko Ono(小野洋子). The subtitle of this book is called “A Book of Instructions and Drawings”. In this book, I will refer to its first section called “music”, she also mentioned a lot of interesting, unusual ideas for making or enjoying music. I will give you some random examples:

TAPE PIECE I

Stone Piece

Take the sound of the stone aging.

TAPE PIECE II

Rome Piece

Take the sound of the room breathing.

  1. at dawn

  2. in the morning

  3. in the afternoon

  4. in the evening

  5. before dawn

Bottle the smell of the room of that particular hour as well.

CLOCK PIECE

Listen to the clock strokes.

Make exact repetitions in your head

after they stop.

In my opinion, they both instruct people to experience some sounds by synesthesia or to reproduce some sounds with methods like memorizing. And just as how Roger Caillois defines games, both of them let people experience sounds or music in a way separated from the routine of life; they let people have an uncertain experience of those sounds, because it is encouraged to involve people’s initiative; what’s more, they are unproductive…

In general, what they both have in common is the use of games or unconventional methods to actively engage people in the act of “listening”. As a non-popular way, this active “listening” is not only an art but also a medium for meditation or thinking.


This is a very interesting passage about two primary art forms: painting and music. In my past knowledge and practice, painting and music, two are parallel. And when we do live coding which combines graphics and music, there is a slight overlap between the two. Specifically, we just try to reflect the rhythms or beats on the graphics while the graphics may have similar themes to the music we make. This passage tells that painting, and by extension, our images can be another form of musical expression and vice versa.

This leads me to think about what kind of combination of graphics and music we are supposed to make. If we only want to make Algorave, it is a good way to use featured themes on both graphics and music, and let the graphics follow the beat or rhythms to change. Because one of the main purposes of Algorave is to make the audience dive into the beats and rhythms, using graphics to visualize the music and the beats of music are always good to use. But when we want to make something more artistic, with the combination, we probably need to change the starting point. Though it’s not the only way to do so, it must be one of the best ways, which is implied in the passage, is keeping the graphics and music parallel. Certainly, it’s not simply parallel. The parallel should be mirror-image relation, or say, the music and image should be doppelgangers of each other. The two can have their own different motives, and the two are interconnected in some ways to present together.

  When I finished my Live Coding course one day and headed back to my room, I met two cats yelling at each other. I recorded the process and began to make my project based on this.

  About the visual part, all of my visual art is developed from a 5-second clip of the cat yelling record. I originally planned to cover color flow over the video. However, I found it may lead to the result that the audience can’t find the cat video backside. So I turned to make the record “repeat” with the rhythm. Then, I added some noise or effect over the cat video. And I paid my attention to if the noise and effect will cover the cat video. 

  About the audio part, my “motive” (ok, it’s not a real motive) is two kinds of “meow meow”, one of them meowing down and the other one meowing up. (you can listen to the meow clip by clicking the link!) And I added beats and some rhythm to it. But I think, I kinda failed to make a real “climax” of the whole song, tho it’s still good!

Enjoy the video:


(Before I decide to use speccy as my project target, I chose mutateful and ossia score. However, mutateful is a tool based on a paid, powerful but complex platform called Ableton live. As for Ossia Score, it says its free and open source, while it asks you to pay 60 dollars only if you want to download it on Windows.)

Speccy actually doesn’t have fancy main pages. It is a live-coding tool made by Chris McCormick, who seems interested in making games and code-generated music. According to the simple documentation and a short demo video, it doesn’t have complex functions, but things like

(sfxr {:wave :square
:note #(sq %
[36 -- -- 41]})

to adjust when and in what pitch the digital note will occur.

However, that doesn’t mean the tool is useless. The tool is bonded with another tool made by the author called jsfxr, to make 8-bit sounds and generate SFX. You can easily access it to get some prefabbed sound effects like coin or jump sound, or you can adjust the parameters to have the different sound effects you want.

Then, you can copy the code and paste it into Speccy like this:


(sfxr "34T6PkkdhYScrqtSBs7EnnHxtsiK5rE3a6XYDzVCHzSRDHzeKdFEkb7TSv3P3LrU7RpFpZkU79JLPfBM7yFg1aTfZdTdPR4aNvnVFWY6vqdHTKeyv8nSYpDgF"
{:note #(at % 16 {0 5 1 27 8 24 14 99})})


And you can make this sound you made just now to occur in your live coding at a certain time and in certain pitches. And you can adjust it with some other parameters too.

Then I will show you what I randomly made with the two tools, hope you can enjoy it. (I’m not using magic but using the clipboard to paste the codes!)

​ This passage talks about the application of information theory in music. It tells that, listening to simple repetitions of a music pattern, people will feel musical at first but gradually bored later. To avoid getting boring, noise or randomness can be used in music.

​ However, not just any random noise should be added to the music. As the author states the nature of noise in music is like this:

Noise is the replacement of explicitly defined information with random data at random times. It’s the degradation of otherwise fully intelligible signal.

So when we want to make music more interesting by adding noise, we must also risk that other meaningful parts will be overshadowed by the noise. At the same time, if the noise added doesn’t fit the structure of the music at all, the music itself can be destroyed as well.

​ After the trial this week, I think the noise is something essential in live coding. Live coders need time to code. In other words, music needs to repeat, not to mention that mistakes can happen. So, some randomness or some ingenious noise can stay in patterns, so that the music we are making would not bore the audience. What kinds of noise should be used are the things that need to be familiar with, too.

​ As for the problem mentioned in the passage and some classmates’ blogs: would noise make them more musical? If we are only talking about classical music now, I would say no. But current music is floating and creating. Reasonable noise can be treated as part of the music. If we consider music as a tool to bring a particular atmosphere, such as live coding in a nightclub, the positive effect of noise is even more unquestionable.